Share
Pin
Tweet
Send
Share
Send
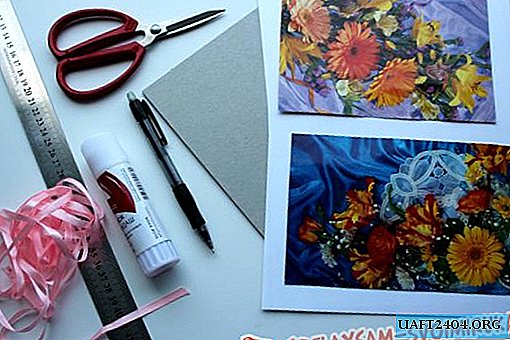
For work you will need:
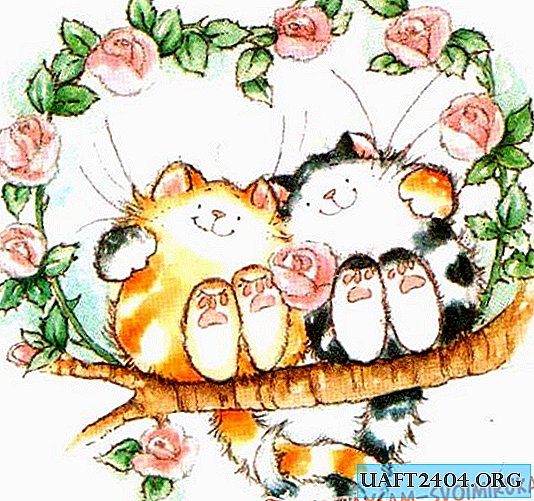
1. 2 photographs or pictures of the same size
2. cardboard, equal in size to the size of the pictures or more
3. white paper or any color
4. glue
5. scissors
6. ruler
7. pencil.
For design: hole punch and satin ribbon.
First you need to make the basis of the picture. We paste the cardboard over with a white sheet of paper. To do this, cut off white paper larger than cardboard by 1.5-2 cm.

Glue the white sheet on the front side of the cardboard, gently smooth it so that the surface is absolutely even. We bend the white paper on the wrong side and carefully glue it. First, from opposite sides, then from the two remaining. As a result, we get the basis on which we will subsequently mount the images. You can use colored paper, the main thing is that it harmoniously blends with the selected images.

If the images are not the same size, we crop the larger one, making them equal in width and length.

The larger side of the picture is divided into equal segments. It is better that there are not very many, but too large will not allow you to get the desired effect. So for a photograph of 10 by 15 centimeters, the ideal size of the segments is one centimeter. For a large image, respectively, increase the size of our segments. Cut the images into equal strips along the long side. At the same time, without confusing, carefully fold them with their front side.

We take a white sheet of paper and measure the height of the image.

Then it is necessary to line our sheet into segments equal to the segments into which the images were cut.

Lined in this way, the sheet is cut into small strips, each of which should have 4 segments.

Bend along the lines. For simplicity and to obtain a neat fold, you can draw along the line with the sharp end of the scissors.

Glue to make a triangle in cross section.

Then we take our blanks and glue our images one by one.

On one side of the triangle should be a strip of the first image, on the other - a strip of the second.

We continue in the same order: on the second blank, the second strip from the first image and the second from the second.

Make sure that one image is always on the right side, and the second on the left. During operation, fold the workpieces with the strips already glued in the same order as you did them.

When all the strips with images are glued to the blanks, you can proceed to the assembly of the picture. To do this, in the same order, without rearranging, glue our blanks on a prepared basis.

As a result of the work, you will get a wonderful picture that will include two images at once. From different angles you can see one of them.


To complete, you need to make holes in the base with a hole punch and thread a tape into them. Everything, an amazing picture is ready, you can hang on the wall.

Share
Pin
Tweet
Send
Share
Send