Share
Pin
Tweet
Send
Share
Send
For this we need:
- The beads are red.
- The beads are black.
- A plastic bottle of green color.
- Thin wire (preferably copper).
- Scissors.
- Kapron tights.
- The potty.
- A candle.
- Matches.
- Sisal is green.
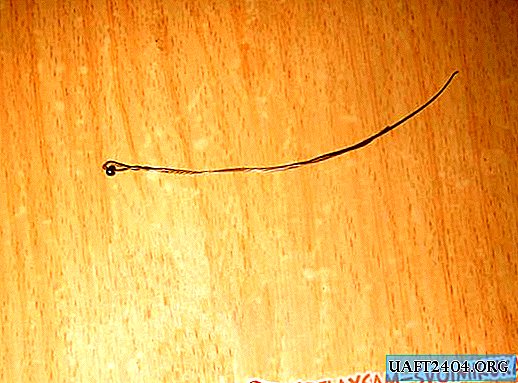
Let `s start? Take the wire and put on it one bead of black beads. We put the ends of the wire together, twist them together and put on a red bead. I didn’t have red beads, but I easily found a way out of the situation by painting white beads with varnish of the desired color. Yes, it is better to take larger red beads, so the berry will look more beautiful.

For one branch, we need 3 berries (or at your discretion). Thus, we make the right amount of berries.

We put the berries together and twist the wire together. Here is what should happen.

The blank for the twig is ready, set it aside for a short while. Now we need a green plastic bottle. From it we will cut leaves. To do this, wash the bottle, wipe it well, cut off the neck and bottom from it, then cut the bottle lengthwise. From this material, we cut 3 leaves with rounded edges and branches into one twig.

With the help of an ordinary burning candle, we will give the leaves beautiful shapes. To do this, you need a leaf slightly under the melt over the fire, only the branches do not need to be melted. The leaf does not need to be brought close to the fire, as the plastic may turn black. Here you can see in the photo that on one leaf the edge is not much blackened, but there’s nothing terrible, you can just cut another sheet and replace it with a failed one.

The leaves are ready (I advise you to immediately make the right number of leaves, so that you won’t be distracted from creating branches. You can also do the number of leaves per branch at your discretion.) Now we’ll take nylon panty hoses and cut a 1 centimeter wide strip from them, the length will depend from the length of the wire (twigs).

Let's start collecting a branch of our lingonberry. Take a blank with berries, attach one leaf to it, so that its twig is pressed against the lingonberry stem and tightly wrap it with a nylon strip. Next, apply the second leaf and wrap it with capron in the same way. With the third leaf, we do the same. After all the leaves have taken their "place" (leaves can be distributed along the entire length of the stem, or can be made just like above, like me), we wind the nylon strip and the stem itself to the end. The end of the strip can be fixed with glue, or you can set it on fire and quickly press it to the stem. Be careful not to burn your fingers. So one branch is ready.

As you already understood, in exactly the same way we make the right number of branches, you can even make berries from different beads. I got 15 things. In the photo there are only 4 pieces.

Take a pot and “plant” twigs in it, and let the green sisal along the edge (imitate grass). You can pour the earth into the pot itself, but if you are doing this kind of crafts for the street, it would be better to pour gypsum or cement into it and until the solution has frozen, insert twigs in it and leave it at rest until the solution has completely dried.

Beautiful lingonberry, made by yourself, will look original and spectacular on any windowsill or in the garden.
Share
Pin
Tweet
Send
Share
Send