Share
Pin
Tweet
Send
Share
Send
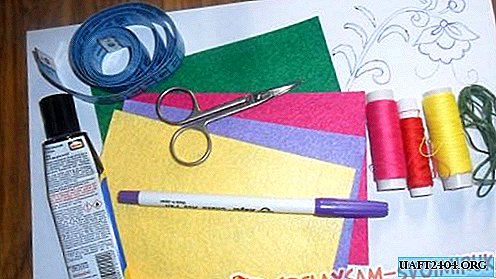
- Patterns of the name FIELD;
- Coarse calico orange monophonic;
- Calico green with a pattern;
- Threads are orange;
- The threads are green;
- White doubler;
- Filler.
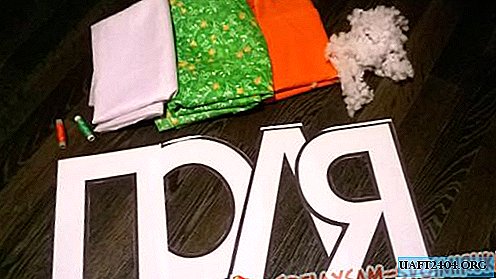
You can use absolutely any fabric, at your discretion, I took calico. As the saying goes, what was at hand. Doublerin can also be of a different color, but for these colors of the main fabric, it is better to take just white, since it does not shine through the base. The filler is also different, and used in stuffing such pillows is also different. I took sintepuh, it is light, elastic, environmentally friendly, that is, it can be used if someone has an allergy, it passes air well, in general there are a lot of advantages of this filler. So, let's begin:
1. Let's start with the letter I. For sewing such a letter, we first take a pattern of this letter. I downloaded it from the Internet, the height of the letters is 30 centimeters.

2. On it we cut 2 parts from the main fabric, but at the same time we fold the fabric face to face.

3. We measure the lateral parts of the letter, make a small margin and cut a strip of green fabric as long as we intended, and 6 cm wide, plus allowances.

4. Cut exactly the same parts from doubler.


5. Duplicate the parts with an iron.

6. We begin to sew the letter. To do this, first we sew the main and side parts of the letter, but first we sew the letters “I” inside the circle, on the one hand, otherwise it will not turn out, then on the outside we sew the side part to the main one on one side, and then only to the other.

7. For even corners so that they lie evenly and neatly, we carve corners.

8. Turn the resulting letter.

9. We fill the letter through the unwired aperture, I made it a little for my friend, as it seemed to me uncomfortable, I teared a small section on the side and sewn up the aperture inside the little circle, and through the opener I filled the letter. Here you can do it as you wish!

10. Carefully fill the corners of the letter.

11. As soon as the pillow is stuffed, we sew the opening manually. It turned out one letter.

12. Let's make one more letter on the same principle. We take a pattern of the letter L. We cut from it 2 patterns of orange fabric.

13. We also measure the lateral parts of the letter, make a small margin.

14. We cut out exactly the same details from the doubler.


15. Duplicate the details.

16. We sew the side part with one main part, and then with the other main part, not forgetting to leave an opening for stuffing.

17. Again, we carve the corners.
18. Turn out.

19. We stuff the pillow-letter. Sew the opening.

20. In the same way we sew the rest of the letters. Get the name of the FIELD.

21. Now you should decorate the letters. I made a bow on the letter O, for this I cut 2 rectangles from green fabric 12 * 7 in size.

from orange fabric 5 * 7

and duplicated them.

22. Sew between each other green rectangles, leaving an opening for twisting. We turn out.
23. We turn the orange rectangle in half lengthwise, stitch it, twist it. Again, fold in half and stitch. In this loop we make a green bow detail. We get a bow.

24. Sew manually a bow to the letter O
It turned out here is such a beautiful name FIELD.

Share
Pin
Tweet
Send
Share
Send