Share
Pin
Tweet
Send
Share
Send
I made this solar furnace for a school project, and here are my results and information on its construction in stages.
1. What is a solar furnace?

A solar oven, unlike a conventional one, is heated with the help of solar thermal energy. Solar ovens can be used to heat food, prepare, or pasteurize drinks. There are several types of solar ovens, for example: conventional solar ovens, solar panels and parabolic solar ovens. They were first invented in 1767 and are still used in parts of Africa, India and China. Next, I will talk about building such a furnace with my own hands, its advantages and disadvantages.
2. Benefits of a Solar Oven
A solar oven has visible advantages. Firstly, they do not absorb electricity. It can save some money. Also, solar ovens can be used regardless of location. Secondly, such devices do not harm the environment, since they do not require the use of electricity.
3. Limitations and disadvantages
The main disadvantage of a solar furnace is that the heating temperature will depend on the design and the amount of sunlight. Therefore, it is not worth using it on a cloudy day - the temperature will not reach the required level. In addition, the weather affects its work. In a thunderstorm or snow, the efficiency of using a solar oven will be significantly reduced. And finally, the most unpleasant fact is that if the solar furnace is not properly built, it can quickly break down, or worse, cause burns.
4. The manufacturing process
To create my own solar oven, I previously read the instructions on the Internet to prevent mistakes.
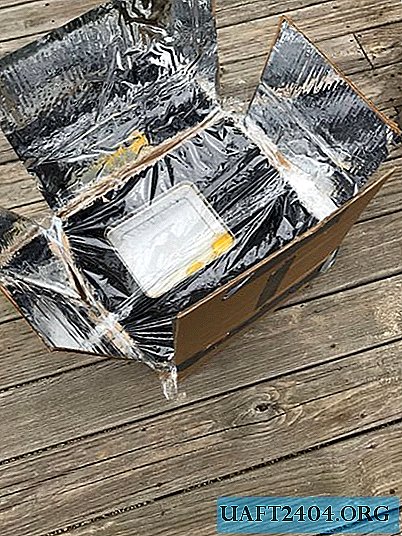
The first thing I did was spray black paint to attract heat inside an ordinary box to attract heat and solar energy. Then I took another box, cut four identical squares out of it, and pasted reflective paper (you can use foil). It remains to stick these panels to the top of the main box.
Next, I installed a solar oven using a metal table, and placed a silver pan in it. He also lowered a thermometer safe for the stove. I tilted the reflective panels slightly so that the hottest spot was in the center.
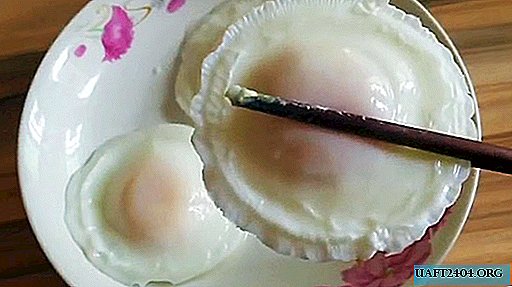
Now it's time to cook the fried eggs. I broke an egg in a pan and closed the top of the oven, which consists of four panels. Also close the oven tightly with cling film. Thus, the heat inside the box will remain and will allow you to cook food.
5. Materials
- Scotch.
- Reflective sheets (foil).
- A few cardboard boxes.
- Metal pan or pan.
- Metal table.
- Spray can with black paint.
- Food wrap.
- Thermometer.
- Egg.
- Scissors.
- Stationery knife.


7. Photos of the process of the invention


8. Photos of the cooking process


9. To summarize.
At 12:15 pm, I started cooking scrambled eggs. I did not pay attention to the temperature on the thermometer, but on the street at that moment it was about 15 Celsius, it was cloudy.
I put the solar furnace in the sun and made sure that the reflective panels were also directed there.
At 15:31, the temperature in the oven was 65 ° Celsius and did not rise higher, so the egg was not completely fried.
In conclusion, I can’t say that the result of this project was successful. I will try to slightly change the design of my oven, for example, you can replace the cling film with a piece of ordinary glass or organic (plexiglass). Because the cling film could go off in some places. In addition, for my experiment, I chose a not entirely successful day - there were no direct sunlight due to clouds.
I hope the article was able to help, and if you need to build a solar oven, you will use my advice!
Original article in English
Share
Pin
Tweet
Send
Share
Send