Share
Pin
Tweet
Send
Share
Send
To work with the toy, it took me seven days of time, as well as materials and tools: template paper, thread, needle, filler (cotton wool), black and beige leather fabric, translucent colored ribbon, glue and a brown bead.
To stitch such a rabbit, you first need to find a sample for him. The sample can be picked up on the Internet and divided into separate components - details:

Now I take both parts of the head and cut them.
I divide the parts of the head and ears into three components, add the forehead and the back of the head to them, and, jabbing these samples to the fabric, I cut out the details taking into account the allowance:

I decided to make a detail of the beige muzzle, which should be under the nose of the future rabbit, to make the toy’s head bigger.
Now I take the details of the ears (the leftmost part is the back, and the middle and extreme right are the front):

I need to stitch these parts, and first I set about stitching the front parts of the ears:

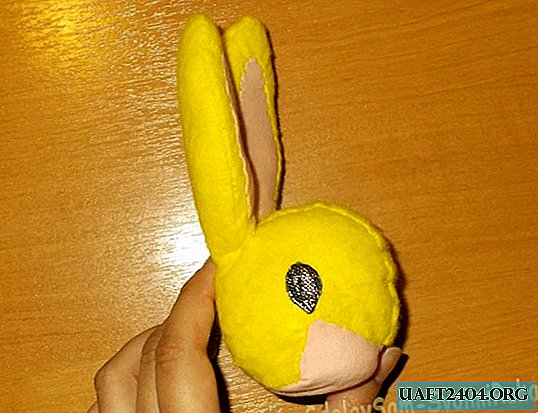
I sew the resulting details of the front sides of the ears with the details of the rear sides and fill them with cotton. From the two side parts of the head, the long rectangular part of the forehead and nose (I will supplement it with the second rectangular part that will pass through the back of the head), and from the part of the muzzle I sew the head for a future toy. And then I cut out the eyes of black leather fabric and stick them to it:

I fill the resulting head with cotton and cut out a detail of the nose from beige leather, which I then attach to the craft:

So the resulting toy head looks on the side:
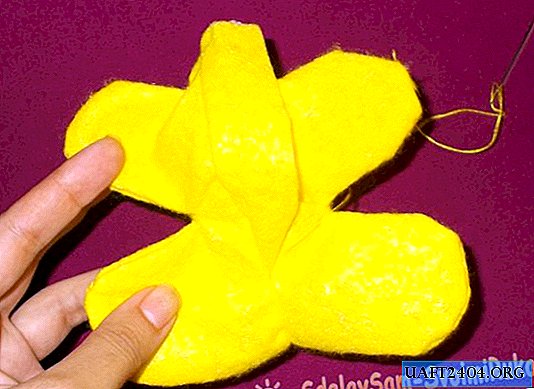
Next, I set about tailoring the torso and neck. First, I sew the neck detail:

I sew the resulting neck detail to the body, and then sew the upper part of the body parts:

Turning to stitching the details of the rabbit's paws, I attach two more (half) details of the paws to them from the inside of them and sew them together (so that in the end we get not two paws, but four):
Having sewed the paws together, I turn the crafts on the front side and fill it with cotton:

Now you can sew the head part to the body part:

From the yellow fabric I cut out two details for making the tail:

I sew a short tail from these parts and fill it with cotton:

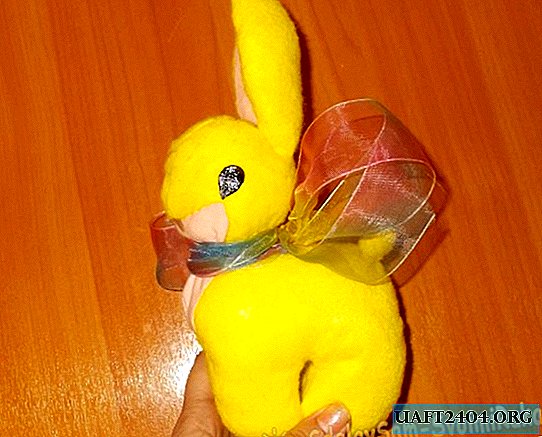
I sew the resulting tail to the toy, and then decorate its neck with a multi-colored ribbon (I tie a bow on the back):

After that, everything: our toy can be considered finished:


I decided to replace a small nose made of fabric, which, being pressed a little inward, is not visible almost, with a small round bead of brown color. After I sewed it, the toy began to look like this (front view):

After that, everything, our handmade toy rabbit, is ready.
(Regards, Vorobyov Dinara)
Share
Pin
Tweet
Send
Share
Send