Share
Pin
Tweet
Send
Share
Send

Will need
To materialize this creative idea into a beautiful product, we need to have:
- a piece of a 10-centimeter PVC pipe about 30 cm long;
- paper;
- wooden box or bar 12 × 6 × 30 cm;
- a small piece of frosted PVC plastic;
- electrical materials (wire, plug, cartridge, light bulb).
You should also get:
- metal ruler and marker;
- dremel;
- milling cutter with nozzles;
- sickle knife;
- emery paper;
- spray paint can;
- glue gun.
Algorithm for manufacturing a lamp from PVC pipe

On the pipe blank we mark a section 24 cm long. Using a sheet of paper, we mark out circular lines on the side surface of the plastic pipe.

According to the circular markings, we cut off with the help of a mini-grinder the excess from the pipe workpiece from plastic.

We have a wooden box on the desktop that will serve as a template. Once again, we will check its cross-sectional dimensions: they should be 12 × 6 cm, which is acceptable as a template for a PVC pipe with a diameter of 10 cm.

We twist a sheet of paper into a bundle and set it on fire from one end from an external source of fire (lighters, matches, etc.).
Thermal energy from a burning sheet of paper will be enough to soften the material of the plastic pipe mainly on one side. This method is for those who do not have a building hairdryer.

Then quickly, until the plastic has cooled down, we insert a wooden template inside the pipe and form a rectangular round section along the entire length, pushing the wooden box through the pipe until it appears on the other side of the pipe billet.

We leave the template in the pipe for a while until the plastic cools down and assumes a stable rectangular cross-sectional shape, after which it can be removed from there. After making sure that the shape of the rectangular plastic element turned out without flaws, we process the ends with a mini-drill, removing burrs and rounding the edges. We use the round ring remaining from the cutting of the plastic pipe as a template for reproducing the circle in the center of the wide side of the rectangular element made of plastic.
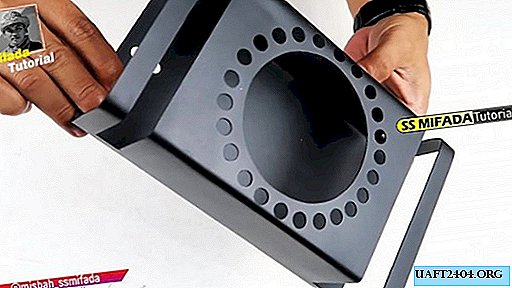
Using a manual milling cutter, we cut out the circle according to the marked markings and clean the edges of the resulting hole, changing the nozzle.

At a certain and equal distance from the edge of the hole, we outline 23 points evenly spaced around the circumference of a large circle. We carry out 23 small holes of the same diameter according to the marked markings. Using a sickle-shaped knife, we carefully remove the burrs from all holes.

On the front side of the rectangular workpiece, where one large and 23 small holes have already been made, we mark two symmetrically located slots indented from the ends by 1.5 cm and a width of 1.5 cm, which will also pass along the sides of the workpiece, not reaching a bit to the opposite wide side.

Carefully cut out the slots with a mini-drill and a cutting disc and remove the strips of plastic, helping yourself with a sickle knife. We also clean the edges of the slots.

On the back side of the workpiece of the lamp housing from one end, we outline and drill with a mini-drill two small holes one below the other and clean them with a sickle-shaped knife.

With a small piece of sandpaper of suitable grain size, we finally grind all the places of cutting and drilling of the lamp housing.
We apply paint from an aerosol can on the future case of our homemade lamp and make sure that it lies evenly over the entire surface and without smudges.

In accordance with the dimensions of the lamp housing 12 × 6 × 24 cm, mark out a sheet of translucent PVC plastic for cutting and cut out a piece of 24 × 24 cm using scissors. Draw a straight line marker with two straight lines parallel to the edges and at a distance of 6 cm from them.

We bend the plastic sheet along the drawn straight lines and get a U-shaped profile, which we insert into the lamp housing so that the wide side fits on the inside of the front panel and overlaps the large and small holes.

We glue the U-shaped matte plastic with a glue gun to the lamp housing in the corners and allow the connection to harden and seize.

We pass the copper two-wire wire through the upper hole made on the back of the lamp housing so that the cartridge at one end is inside the housing.

We attach an electric plug to the second end of the wire, and we screw an incandescent bulb with a colored bulb with a power of not more than 5 watts into the cartridge in order to preserve the plastic from which our lamp is mainly assembled.

We plug the plug into an electrical outlet so that a light comes on inside the body of our homemade product. As a result, we will witness the unusually beautiful glow of our decorative lamp, the effect of which will increase even more if you place it in a dark place.


Attention!
Plastic dust poses a serious danger to your health, so the mask on the respiratory organs will be quite useful for the whole time working on the lamp from the PVC pipe. Gloves and goggles also do not interfere.
Share
Pin
Tweet
Send
Share
Send

