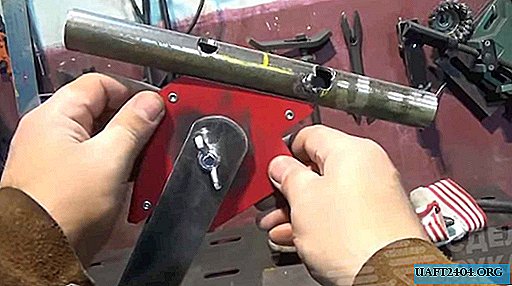
Sometimes you need to weld something somewhere, and for this you need to fix the part or workpiece in a certain position. In fact, only a “third hand” is required. Here is a homemade magnetic positioner and performs this function.

This device can be made from two magnetic corners for welding. Also required: two bolts, a pair of wing nuts and four washers of suitable diameter.
The whole point is that you need to insert a bolt into the hole in the corner, and then weld the nuts on both sides of the case. Moreover, the cap of the bolt itself must be welded to the washer so that the bolt does not turn.

The main stages of work
To connect two magnetic corners with each other, two segments of a metal strip are used. In this case, the author took a strip 40 mm thick, but you can use a smaller thickness - 20 mm will be enough.

In strips, you will need to drill two holes at the edges. At the same time, the edges themselves must be rounded so that there are no sharp corners. This, first of all, is necessary for the convenience of working with the device.
At the next stage of the work, the author welds washers on both sides of the body of the magnetic corner. To do this, he uses semi-automatic welding, but you can also grab the electrode.

It is enough to make several tacks on different sides of the washer - there is no need to completely scald. And it will be difficult to weld a galvanized washer to a magnet.
Then the assembly of the device is performed. Details on how to make a simple magnetic positioner for DIY welding can be found in the video on the website.