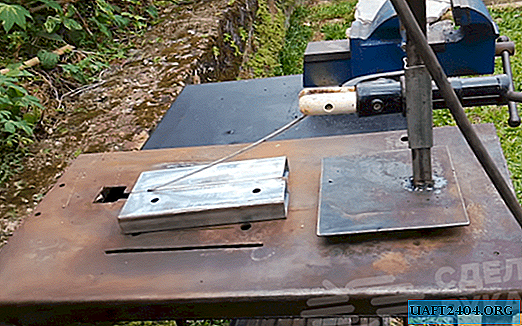
To conduct this non-standard experiment with a welding electrode, you will first need to make a vertical stand on the base. The stand itself is attached to the metal table with a large magnet, and a holder for the welding electrode is fixed in the movable carriage.

For the manufacture of this homemade product a minimum set of materials is required - this is a steel plate of a square shape with a thickness of about 2-3 mm, a piece of a thick-walled round pipe, as well as two pieces of a profile of a square section 25x25 mm and 30x30 mm (long and short).
The main stages of work
At a distance of about 5-7 cm from the edge of the steel plate, it is necessary to weld a vertical stand from a long profile pipe 25x25 mm. The length of the workpiece is 25-30 cm.

Then, to a short section of the profile with sides of 30x30 mm, you need to weld a piece of a thick-walled round pipe in which we pre-drill a hole. We screw a bolt with a plain and wing nut into the drilled hole (the lower nut must be welded to the pipe).

We put the resulting carriage on a vertical rack. We pass the cable from the welding machine into the round pipe and insert the “clothespin” type electrode holder, fixing it with a bolt. With the help of a large magnet, we fix the homemade base in the right place on the metal table.

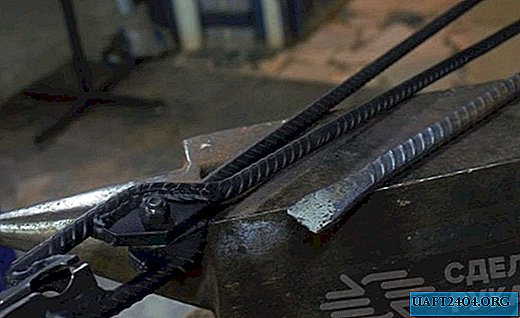
Next, we set the required current for welding, clamp an electrode of a suitable diameter in the holder and abut it in the joint between two workpieces that need to be welded together. We light the arcs, and then the electrode cooks itself.
To summarize

Of course, this experiment was initially doomed to failure (a high-quality weld in this way will not work out unambiguously), but you must admit, it is always interesting to experiment a bit in search of easy ways. You can watch the experiment process in the video on the site.