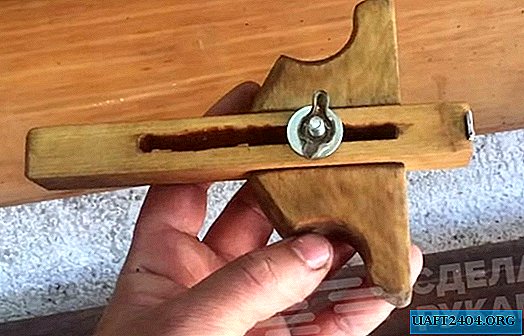
The design of a homemade thicknesser is a block and a movable rod, which is fixed in position by a bolt with a convex hat and a wing nut. Due to the simplicity of the design, the device is very easy and quick to set up.

Another important detail of the thicknesser is the so-called "scratch" (a small wedge-shaped knife-cutter), which is attached to the end of the rod. Using this homemade thicknesser, you can mark up on a wooden surface parallel to the edge of the part.

In principle, metal blanks can also be marked, however, this will require a cutter made of high-quality steel, which will not quickly blunt (for this purpose, a pore turning cutter for metal is ideal, for example). We will make a block and a rod of a surface gage from a wooden bar and a lath.
The main stages of work

As a "raw material" for the manufacture of a homemade thicknesser, a wooden block with a side size of 40x60 mm is required. Using a plane we align two planes - they should be at 90 degrees relative to each other.

Then we saw off a 20x30 mm rail, which will be used as a movable rod. In the center of the planed bar, use a chisel to select a groove 20 mm wide and 30 mm deep. In the rod, we make a through longitudinal hole for the bolt (so that the cutter reach can be adjusted).

Then we drill two large holes in the block and saw off the edges at an angle of 45 degrees. Using a bolt with a wing nut, we fix the rod with the cutter. The surface of the finished product can be coated with colorless varnish or mineral oil. How to make a marking planer with your own hands, see in this video.