Share
Pin
Tweet
Send
Share
Send
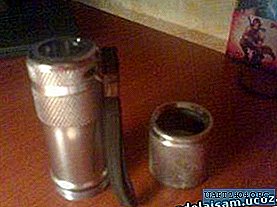
Many beginner hams often experience problems with drilling printed circuit boards. To solve this problem, I can advise you to make this device. This is nothing more than a homemade mini drill for circuit boards.
Surely you have already noticed that the body is made of an unnecessary LED flashlight. In general, I did this: first I took apart the flashlight and pulled out all the insides.
The first and last thing we need is an engine. It can be pulled out of some tape recorder with a CD, for example, as I did. He had 12 volts of power. Then you need to solder the wires to it, through the flashlight switch, respectively, so that you can turn it on and off.


Now we fix the motor in place of the LEDs, I put the motor on the glue. What you stick on is a matter of taste.

I want to advise you on how to drill and how to fix the drill for one thing: you need to choose a drill according to the diameter of the motor shaft. And they are connected with a piece of paste from a ballpoint pen about two centimeters long. If you do not have a drill - it does not matter! You can use the sewing needle after breaking off the tip.
and so now we’ll deal with the project’s decorations, for example, I wrapped the entire cord in a beautiful tube and now so that all your efforts do not go to the empty place, fix the tube with screeds can be purchased at the nearest store where this is how I pulled the screeds

Now we collect everything in the flashlight body! Everything is ready! I carry out food from the same tape recorder with CD.

Good luck
Share
Pin
Tweet
Send
Share
Send