Share
Pin
Tweet
Send
Share
Send
For its manufacture you will need the following materials:
1. The basis for the postcard. Thick A4 paper folded in half.
2. Medium-density paper with a pattern suitable for a man’s shirt. Such paper needs 2 sheets, A4 size. And it would be better if at least one of the sheets is double-sided. That is, if you are looking for a texture on the Internet to print it on a printer, then one sheet will need to be printed on both sides with the same texture.

3. Sewing machine with matching thread colors.
4. Buttons for a shirt or brads - 7 pieces.
5. Glue - a pencil or any other glue.
6. Double-sided thin tape for gluing shirt elements to paper.
7. Moment glue or glue gun.
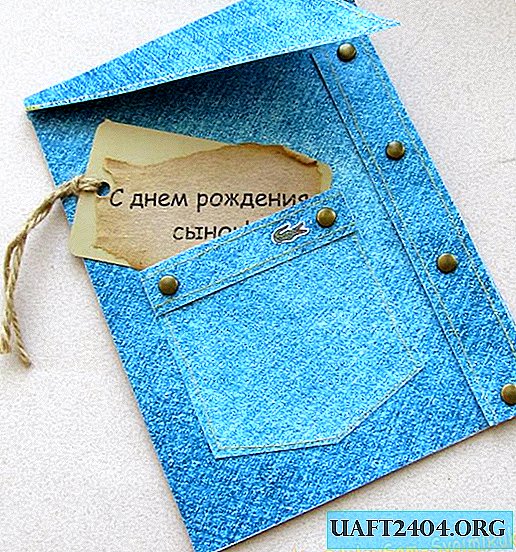
8. Any additional decor, in our case the emblem of the company Lacost.
The first thing in the manufacture of any clothing is taken measurements and a pattern of individual elements is made. Here you need to do the same. According to the proposed patterns, it is necessary to cut out the details of the shirt.


If the paper is single-sided, then the collar element needs to be cut twice in a mirror form and the parts should be glued together. The collar must have a texture on both sides! The collar must be bent along the lines.
Now you need to sew on the sewing machine the details of the pocket, strap and collar.

Paper is sewn just like fabric, and there is nothing to be afraid of. If the paper is thin and tears at the seam, you need to increase the stitch length. All strings are tucked inside out and glued with an adhesive pencil.

Pay special attention to the collar, as there is no wrong side. Threads need to be tied with knots, carefully trimmed and fixed with a drop of glue from blooming.
After attaching the largest detail of the shirt to the base of the card, you need to outline an oblique line from above. Carefully cut the base of the card along this line. A collar element will be glued along it.
The card is assembled in the following order: The collar is first glued to the base, for the lower part of it. The collar and stand will add volume to the card.


Then the largest unstitched part is glued.

Brads are attached to the bar or buttons are sewn with thread, all but the top. In the same way, button decor is attached to the pocket element. There is a special approach to the top button. It needs to be filled with threads and glued to the stand of the collar in the finished form. At the brads, the legs are removed, and the hat is glued to the "Moment" or an adhesive gun.
When all the elements of the shirt are assembled, you can glue 1.5-2 cm of the collar to the shirt at the base. The shirt will get a realistic look.


Create and be happy!
Share
Pin
Tweet
Send
Share
Send