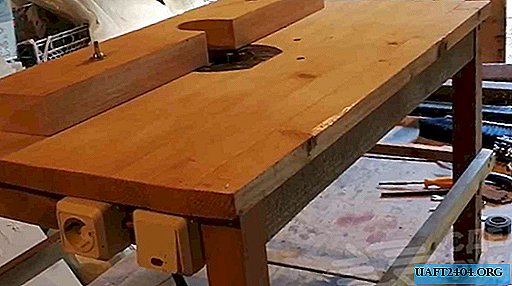
In this review, the author shows in detail how to make a milling table in a workshop with your own hands. Someone might like this option.

A wooden shield is used as the top of the table (tabletop). You can glue it yourself or buy it ready (for furniture) in the store.
Recommended reading: compact milling table for the home workshop.
In the central part of the countertop, you need to mark the holes for installing a manual milling cutter. It is also necessary to mark the holes (grooves) for mounting the guide.

The main stages of work
After marking, we get an electric drill with a manual jigsaw, and begin to work: we drill and cut it out.

Next, we make the frame of the table (that is, we connect the four legs together with the help of the king and the cuts), and we attach the tabletop to it.
We insert bolts into the holes drilled in the countertop and fix them with nuts on the back side.

Then we install a manual milling cutter, and fix it with metal strips.

At the next stage, a parallel stop (or guide) is attached to the working surface of the table.

For its fastening, the author uses bolts with wing nuts, which are inserted into the grooves in the countertop.
In the end, it remains only to carry out electrical work. Electricity to the router will be supplied through the switch.

For details on how to make a milling table in a workshop or garage with your own hands, see the video.