To reduce the risk of rusty “stains” on the hats of a screw or self-tapping screw, they are often painted. Plastic plugs are not able to provide reliable protection against corrosion.

However, immediately before painting the hats, it will be necessary to prepare the screws so that later the paint does not cling. How preparation is carried out will be discussed in this review.
Of the main materials, solvent 646 (or similar), a primer for metal, paint in a spray can and sandpaper will be required. It is also advisable to use a piece of dense foam, in which it will be possible to screw self-tapping screws before painting.
The main stages of work
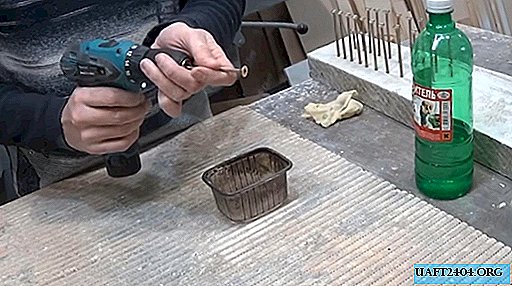
First of all, the head of the screw or self-tapping screw will need to be sanded. To do this, we clamp the self-tapping screw in the chuck of a screwdriver (or electric drill), and grind it on sandpaper.

Next, the self-tapping head will need to be temporarily lowered into the tray with the solvent. This is necessary in order to degrease the surface of the metal. Then we screw a self-tapping screw into a piece of foam.
At the next stage, the head of the self-tapping screw needs to be primed, and only then can you start painting. For best results, it is advisable to paint the hat in several layers.

In detail about how to prepare the hats of self-tapping screws before painting, we recommend watching the video on our website.