Using a simple home-made mini clamp to fix various parts, it is very convenient to process small workpieces in the home workshop. At the same time, working in close proximity to the grinding wheel or blade disc, the risk of injury will be minimal.

You can make such a practical mini clip from available materials at hand, which often lie underfoot in the garage and workshop. Four steel plates, an elongated nut and a stud of a suitable diameter will be required for operation.
We begin to manufacture a mini clamp. To begin with, we take two pieces of a metal strip and drill holes in them at the edges. We take the following two segments and cut off their corners, forming as if stretched triangles with corners cut off at the base.

The process of making a mini clamp
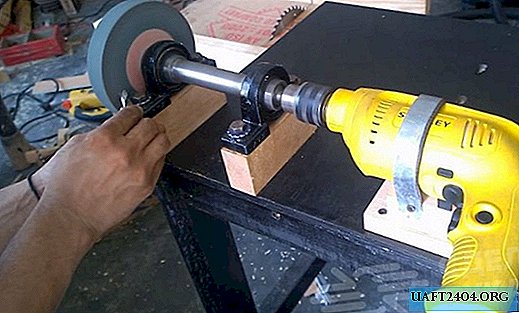
We lay the blanks with bases to each other, leaving some distance, and on them we impose the first strip with holes. Mark the "triangles" and drill. Next, an elongated nut will need to be screwed onto a segment of the stud. Then grind it to the desired shape on an emery or grinder.

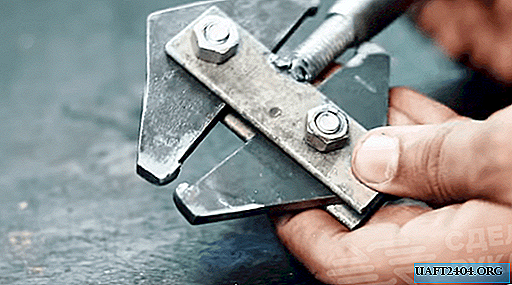
We weld the hairpin to the strips with holes, previously connecting them with bolts to other blanks in the form of triangles. First, in the center of the triangles, it will be necessary to make one through hole.

At the ends of the clamping jaws, we make small “hooks” by welding. Then with the help of bolts and nuts we assemble the structure.

Clamp small workpieces in a mini clamp by screwing in the “handle” of the elongated nut. It will expand one part of the product, and the other will clamp the parts intended for processing. For a detailed process of making this homemade product, see the video on the site.