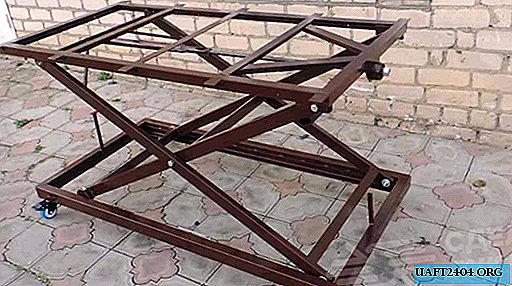
In this review, the author shows the manufacturing process of a scissor lift table. A great option for a home workshop.

At the first stage of manufacturing a lifting table, it will be necessary to cut workpieces of the desired size.
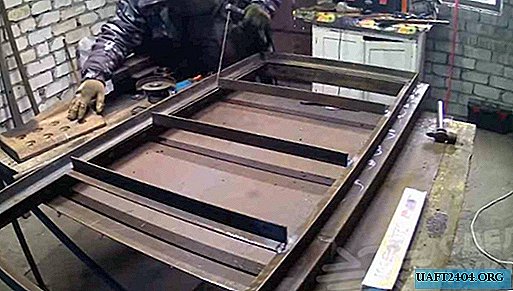
First, the author proceeds to manufacture the bottom of the table (dimensions - 1500 * 750 mm). This will require blanks from a 60x40 mm profile pipe 2 mm thick.


A corner of 30 * 4 mm should be welded to the long sides of the lower part of the table.

Moreover, it is not necessary to cook a continuous seam - you can make tacks in several places along the entire length (at the same distance from each other).
The main stages of work
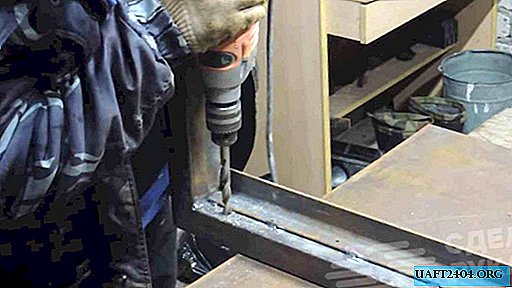
At the next stage, the author cuts the blanks from the professional pipe 50 * 25 mm with a wall thickness of 2 mm. They need to drill holes for a bolt with a diameter of 12 mm.
Also, the mounting holes will need to be drilled at the bottom of the table.
At the edges of the blanks from the profile pipe 50 * 25 mm, the master welds the rollers for sliding gates.

Next, the author proceeds to manufacture the upper part of the table (dimensions - 1420 * 670 mm). For this, segments of the building corner are used.
To the upper frame, the author welds pieces of a profile pipe with bolt holes.

The author also welds an amplifier to the top of the table (from a profile pipe 25 * 40 mm with a wall thickness of 2 mm).

After that, the author cuts a steel bar with a diameter of 14 mm and inserts it into a pipe with a diameter of 15 mm. The ends are welded to the rollers for sliding gates and reinforced with pipe sections.
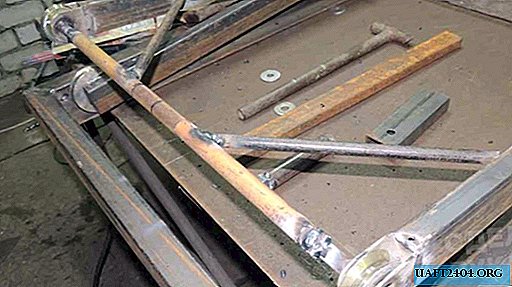

It is also necessary to weld a corner with a hole for the hairpin to the top of the table and pieces of the pipe 20 * 40 mm for reinforcement.


At the last stage, the author proceeds to assembly. A detailed process for manufacturing a lifting table, see the video.